Create Envelopes and Send Them
Now we have created and confirm contact between test companies we can continue with creating envelopes with documents we want to send.
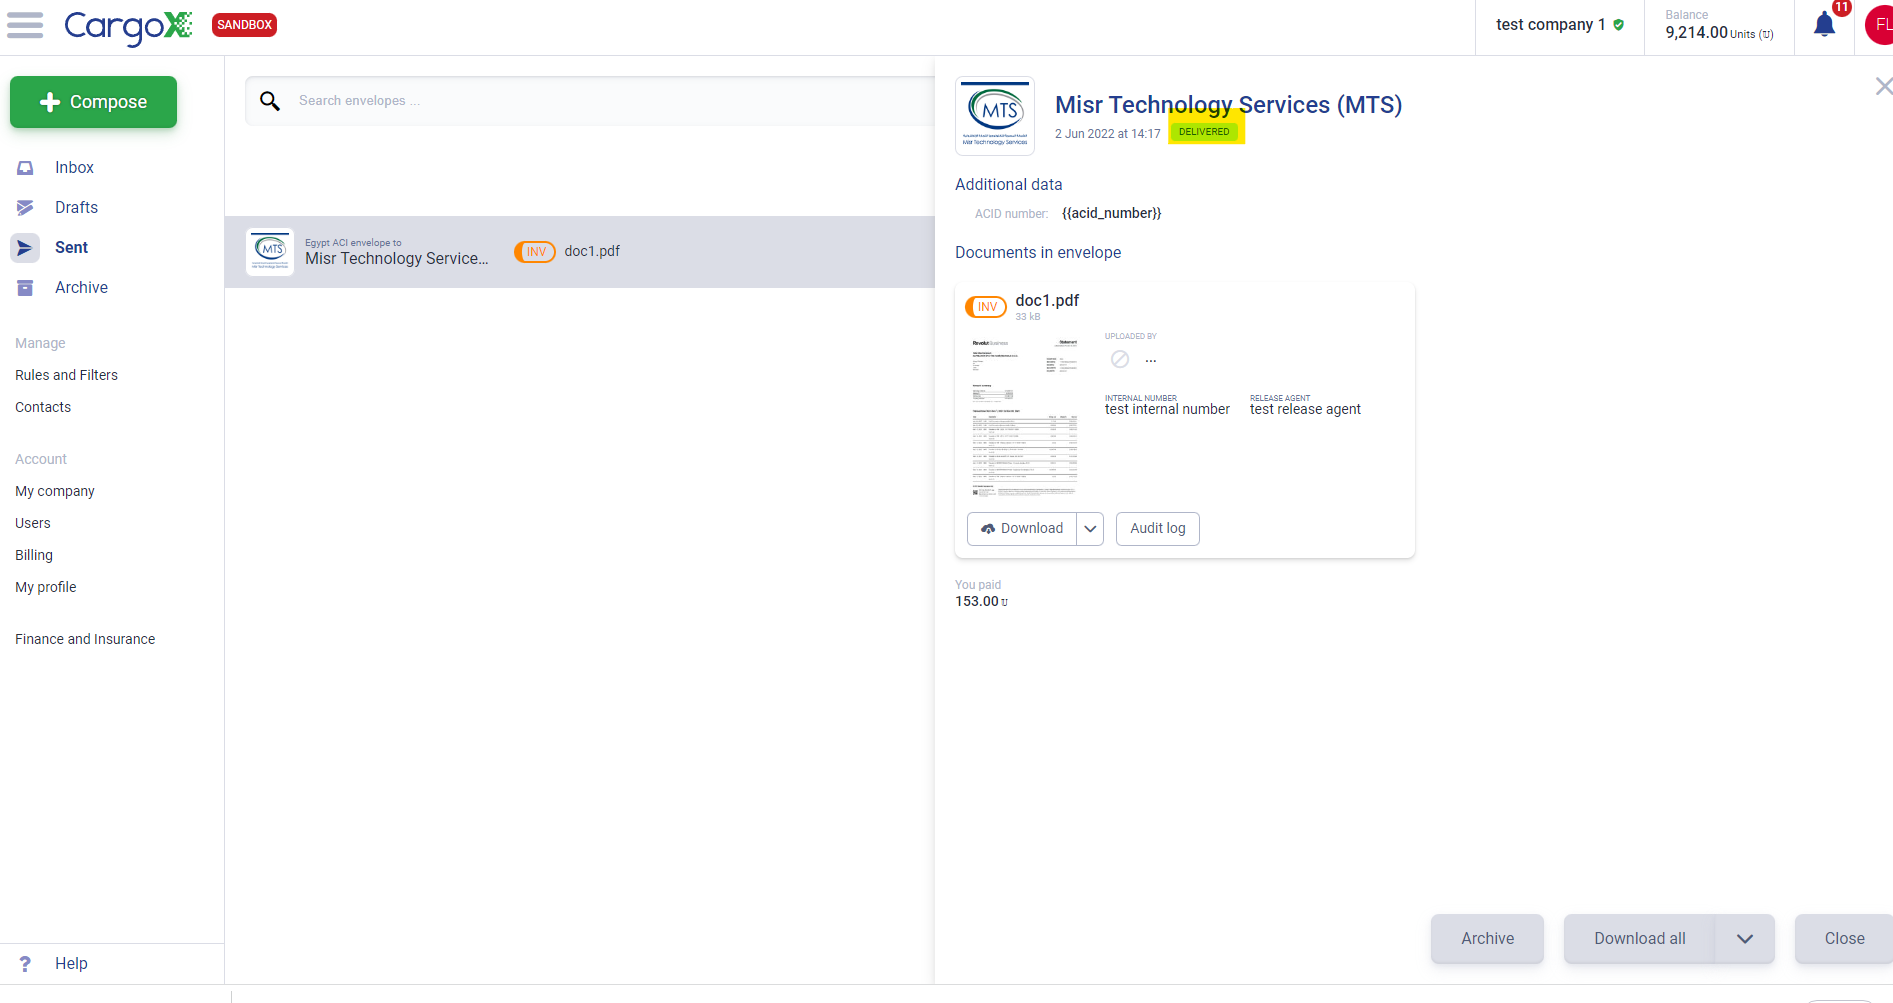
Egypt ACI envelope
If you want to read more info about egypt-aci, please go to: https://cargox.help/hc/en-us/categories/7534146819473-Egypt-ACI.
Now we will create Egypt ACI envelope. Just click on ACI Egypt Envelope -> Create ACI Egypt Envelope.
Postman collection doesn't ship with data included. Please add a pdf document. Make sure that it is named doc1.pdf. Alternatively, you can change the payload in documents_metadata to match the document's filename.
For testing purpose, we use test ACID numbers - already inserted in Postman collection variables. If this is missing or does not work, please contact CargoX support.
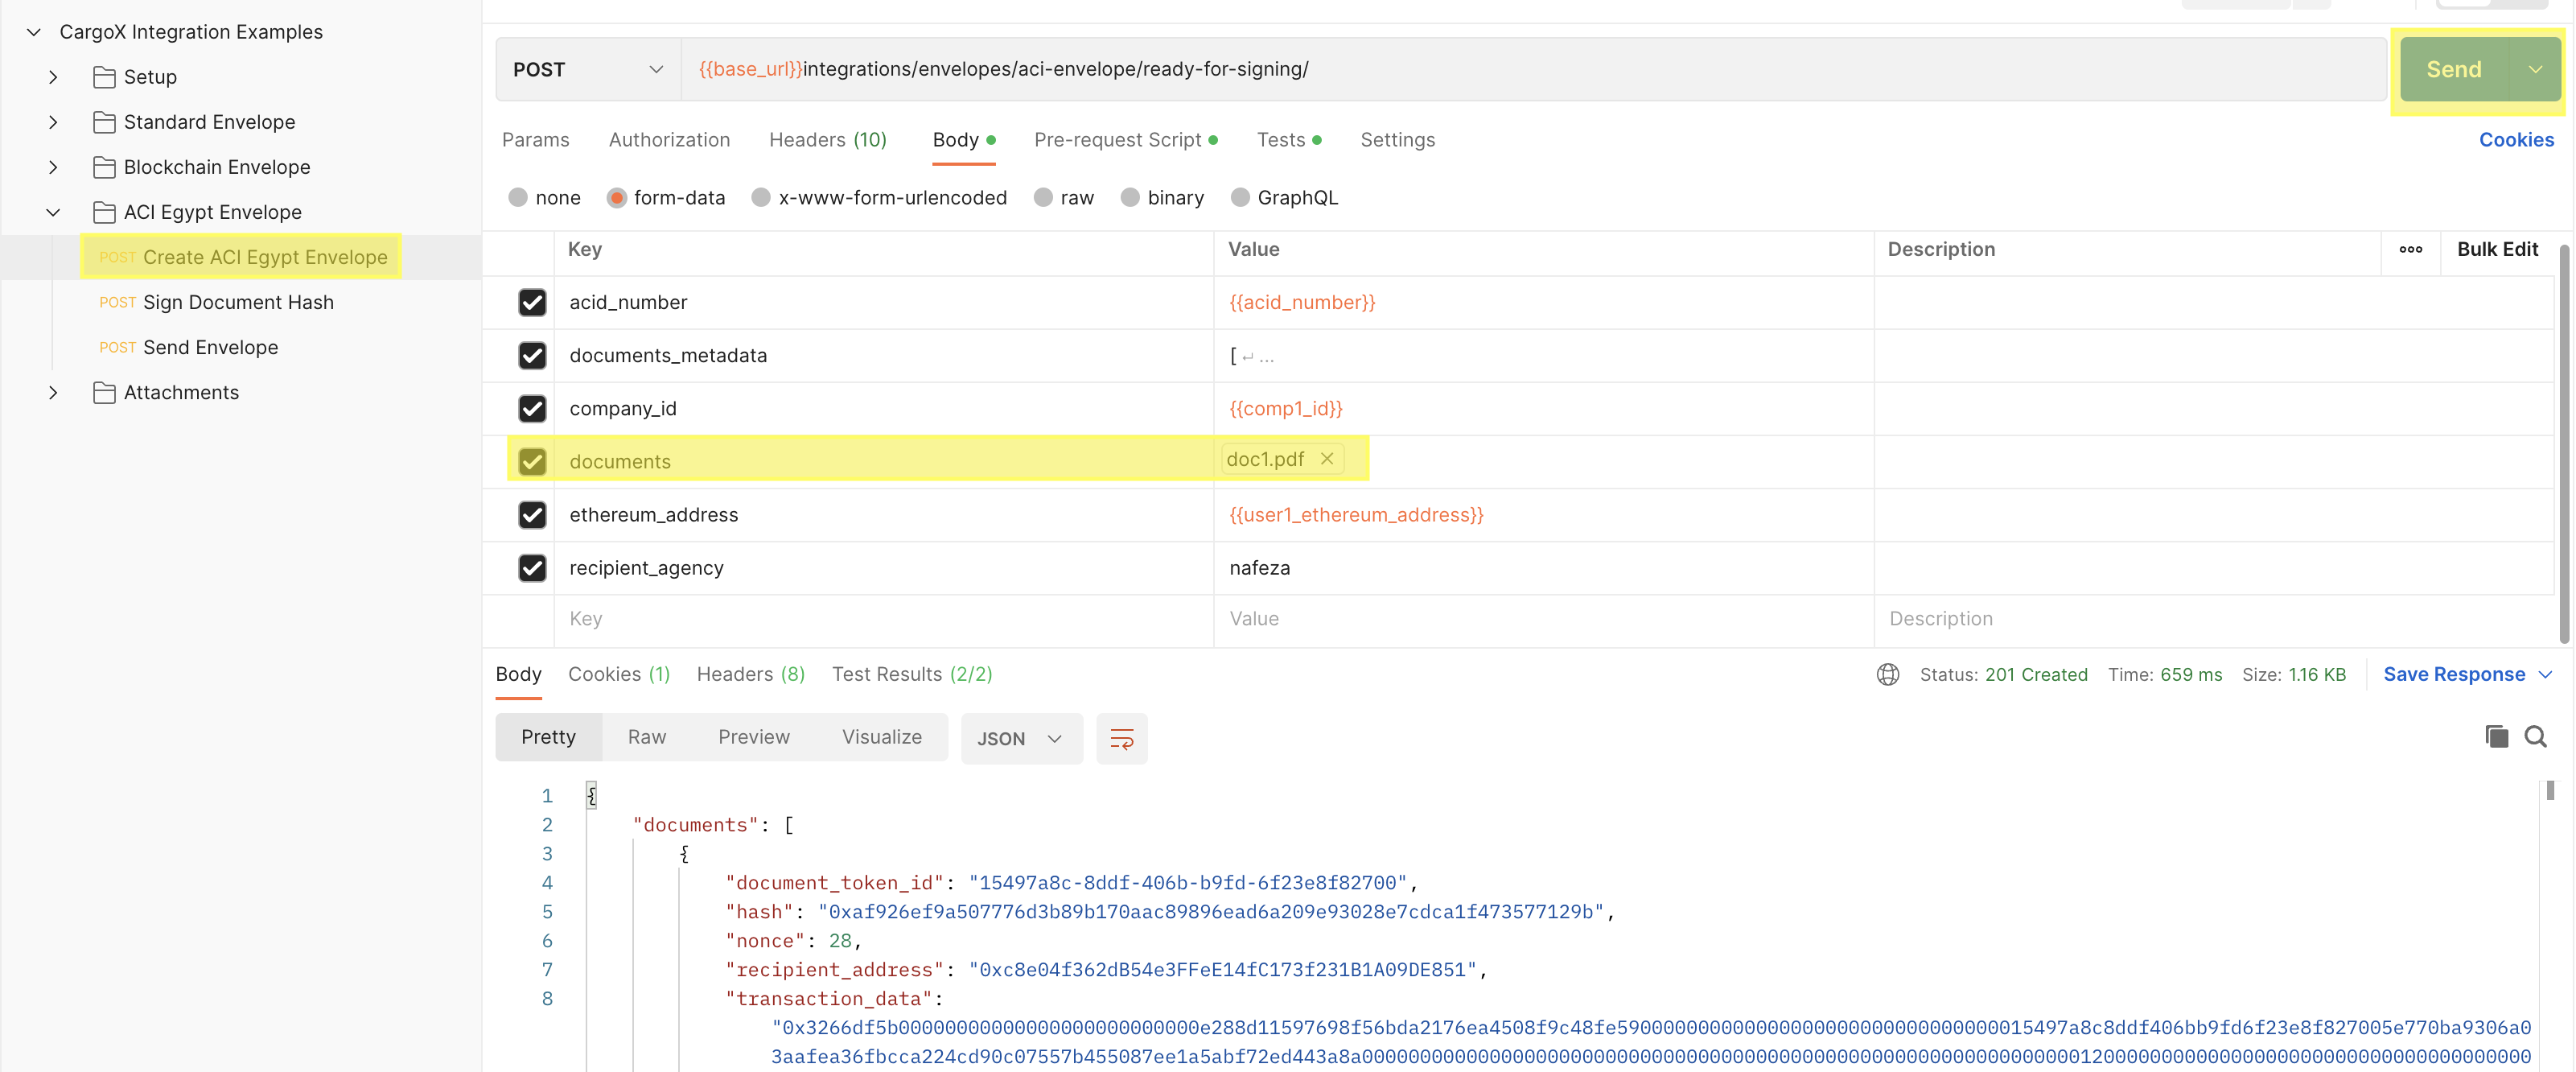
Since we want to send blockchain supported document, we need to have some credits in our company, else we get an 407 - Unknown status with body:
{
  "status": "Not enough credits."
}
If you are working in sandbox environment please contact CargoX support, to top up you test company with some credits.
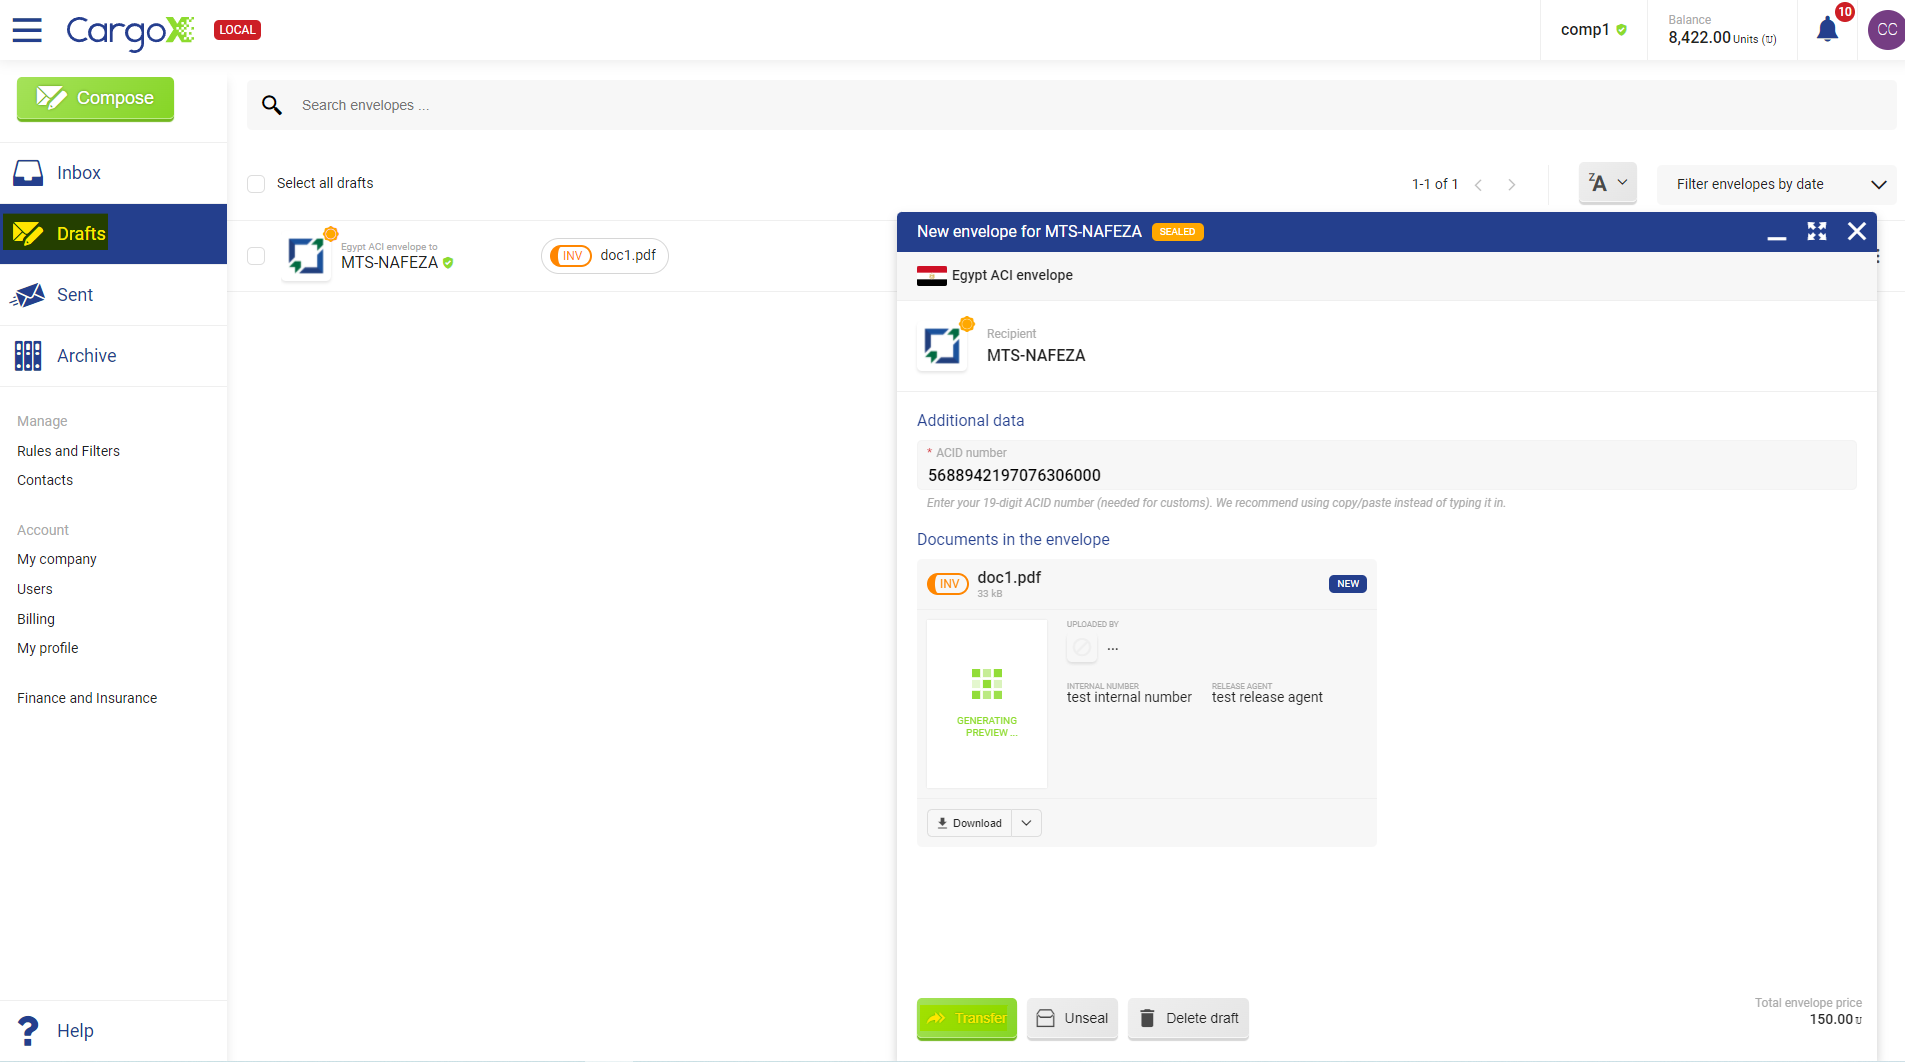
After we click send, we can immediately see on web app that envelope has been created. Click on the Drafts tab and open envelope. As we can see, recipient is MTS-NAFEZA. We can also try and Transfer this new envelope.
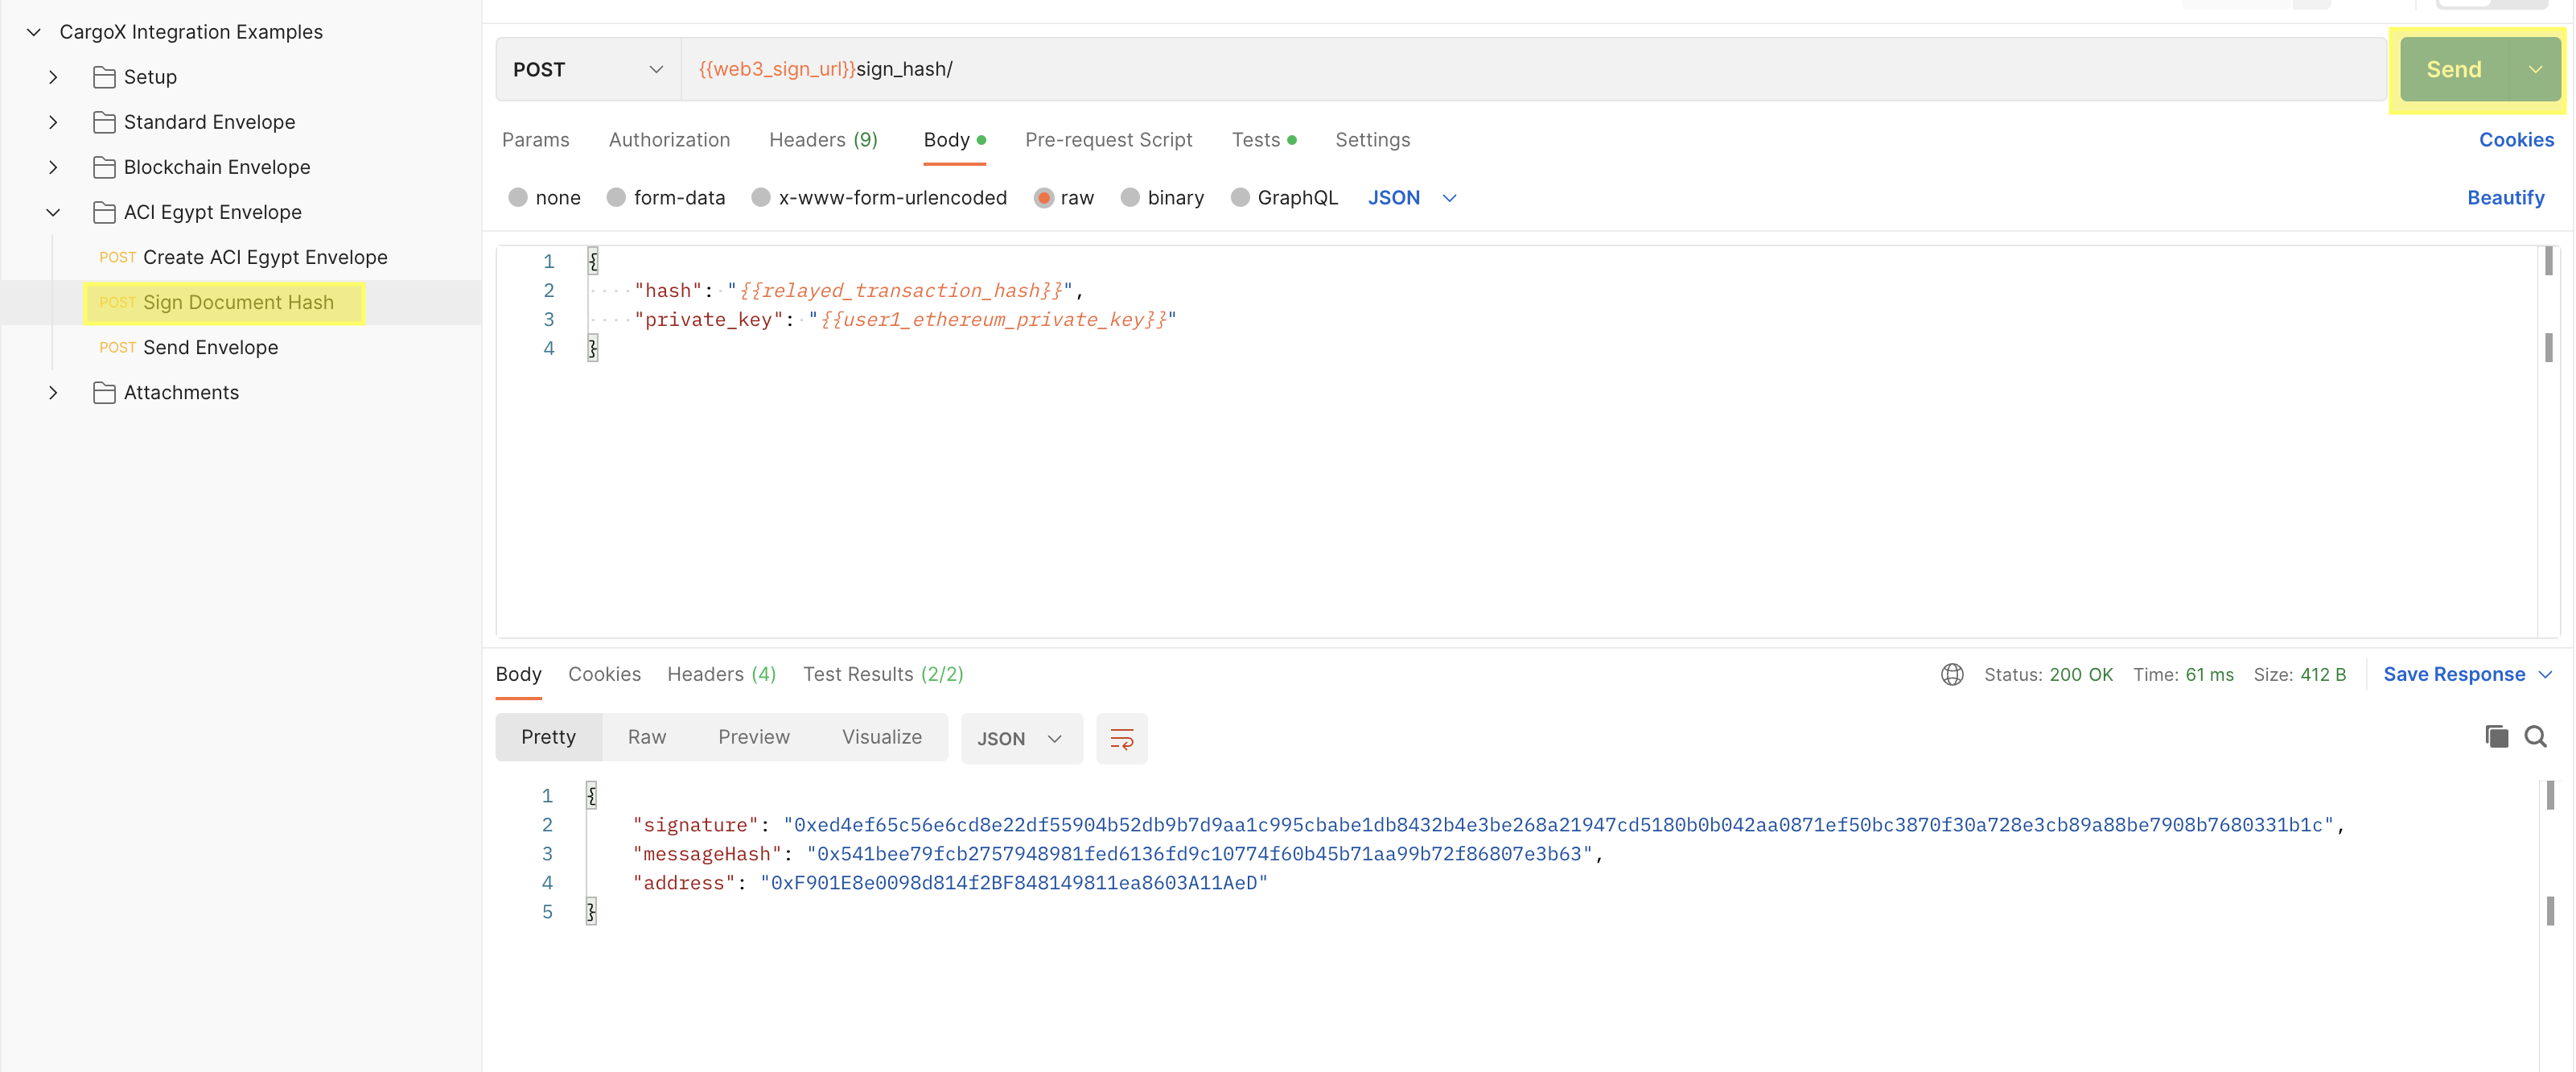
Next we sign relayed transaction hash we got from previous call with user1 private key. We will use docker image we installed in getting ready. Everything is set up, we just need to click send button. All the data will be automatically retrieved and saved to collection variables!
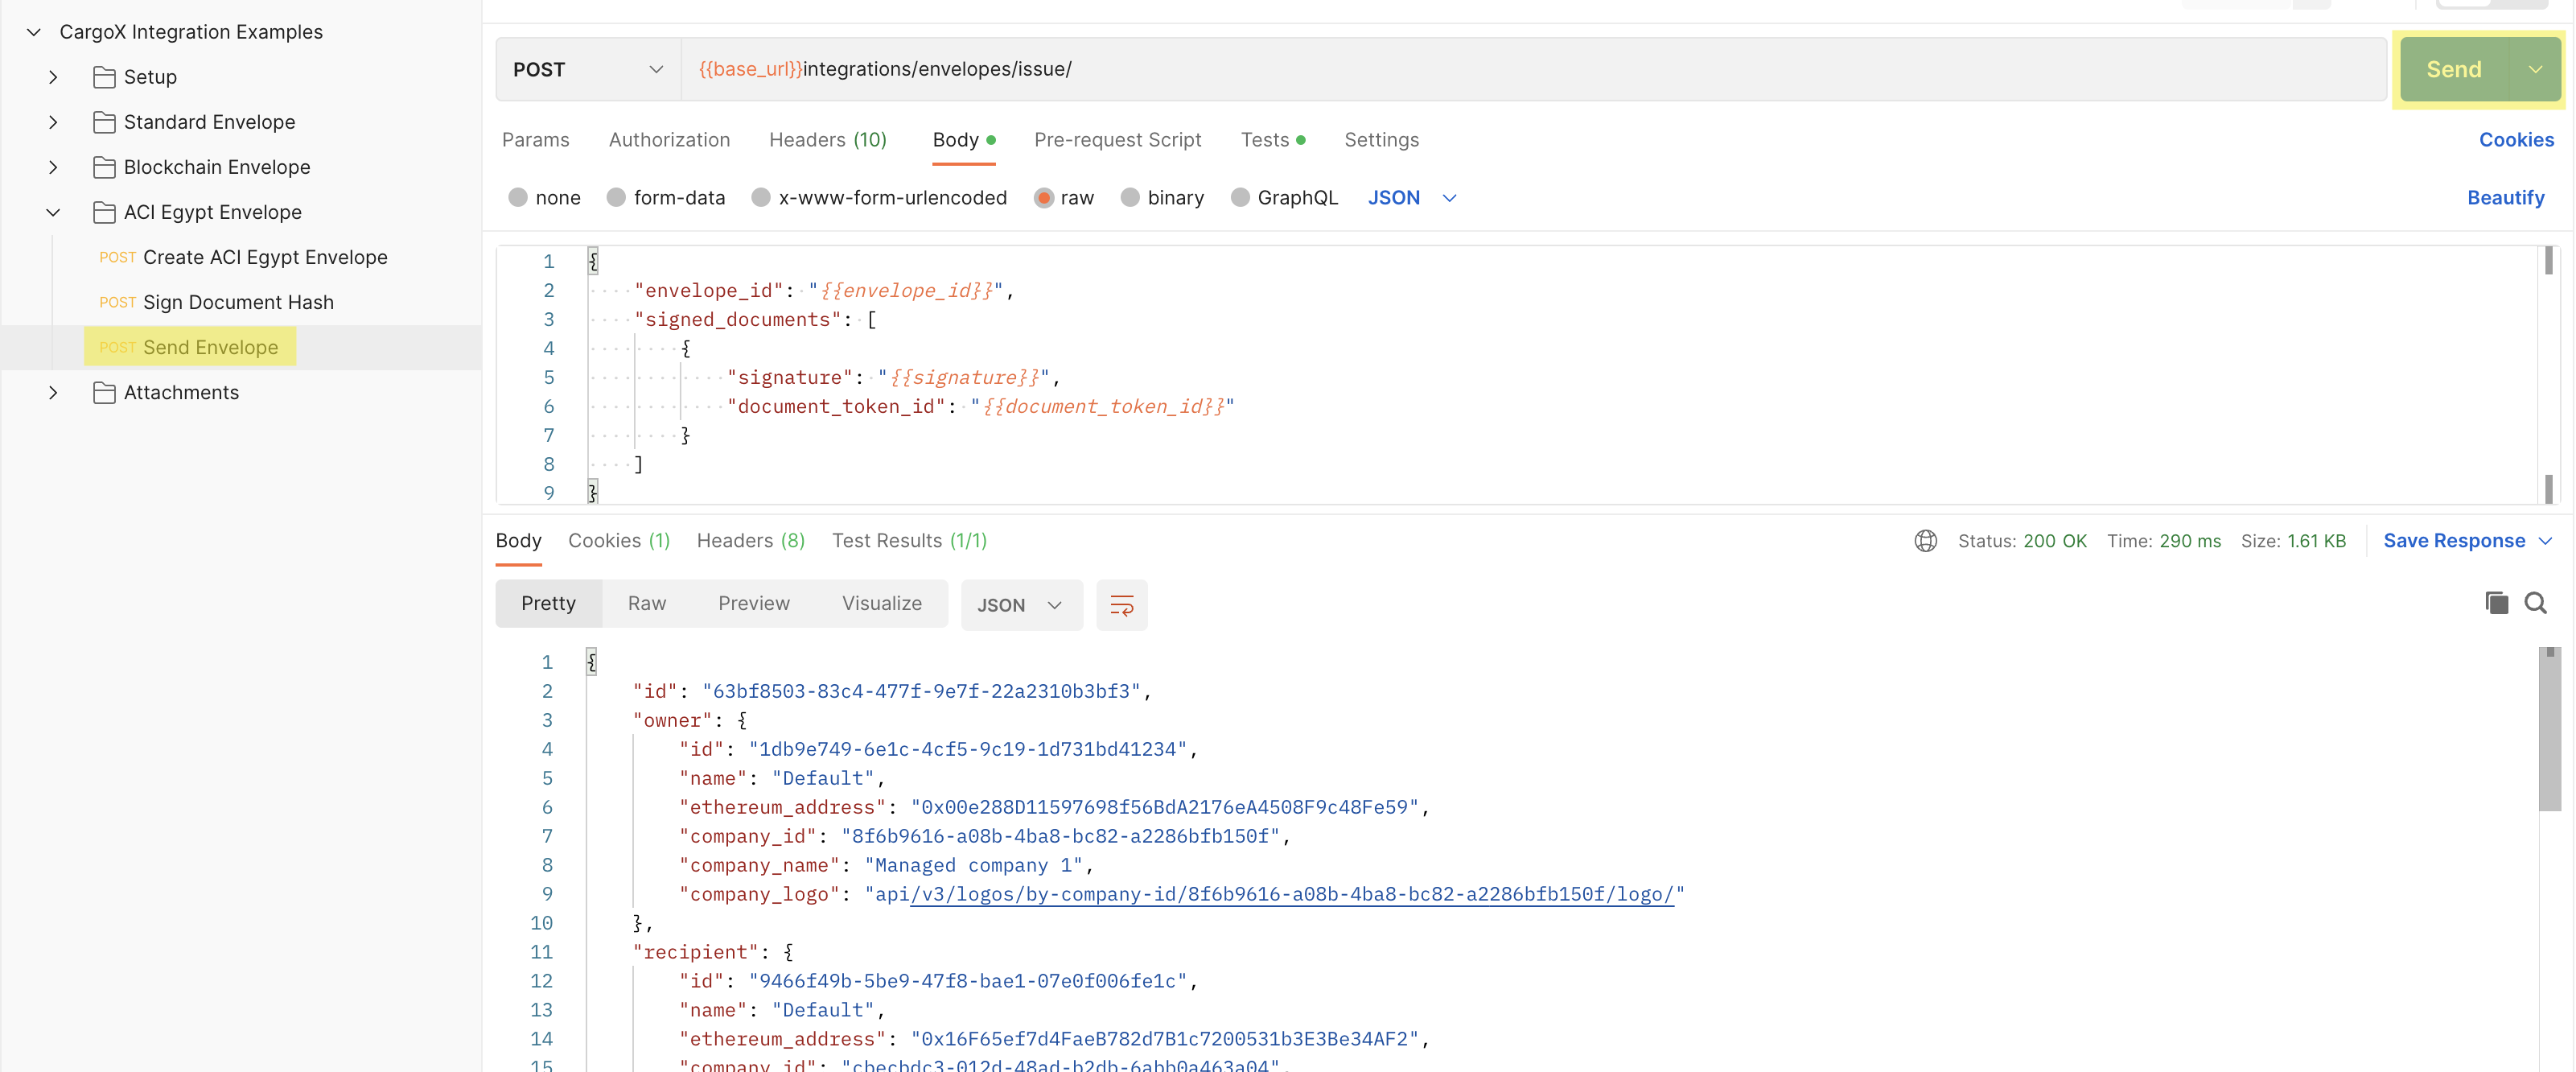
The only thing left to do is to actually send the envelope. We head to ACI Egypt Envelope -> Send Envelope.
As we can see in our web app, the envelope was delivered to Nafeza.
Blockchain envelope
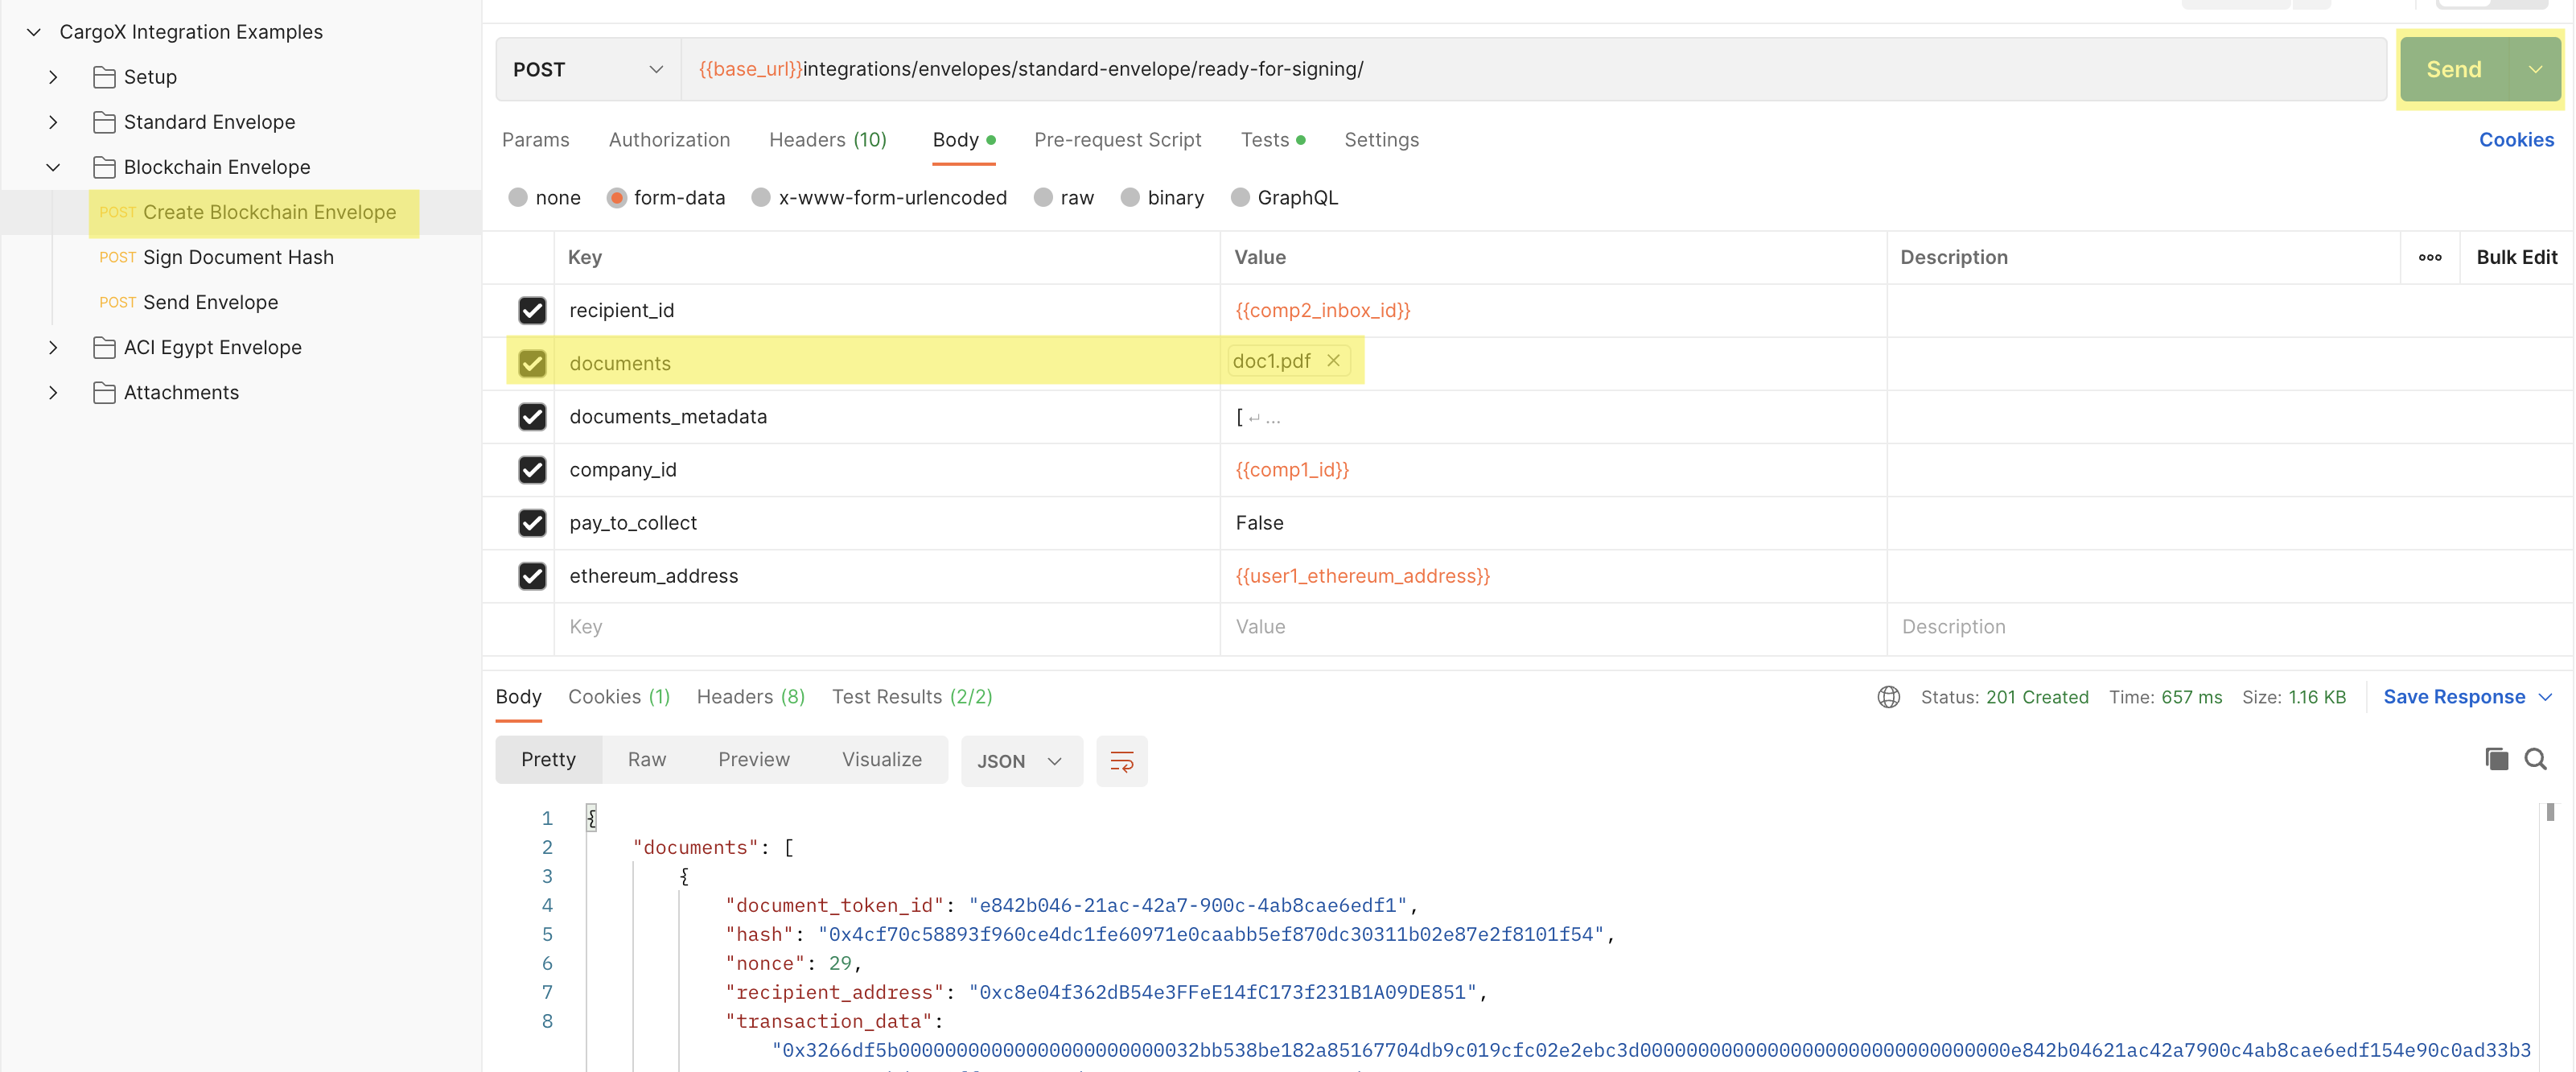
Adding and sending blockchain envelope is similar to ACI envelope. The only difference is that we do not have to insert ACI number, but we have to add recipient. In postman example everything is already set up, the only thing to add is some pdf document.
Just click on Blockchain Envelope -> Create Blockchain Envelope. The only thing we have to add is some pdf document.
Since we want to send blockchain supported document, we need to have some credits in our company, else we get an 407 - Unknown status with body:
{
  "status": "Not enough credits."
}
If you are working in sandbox environment please contact CargoX support, to top up you test company with some credits.
After we click send, we can immediately see on web app that envelope has been created. We continue to click on Sign Document Hash and Send Envelope just as we did with the ACI envelope before.
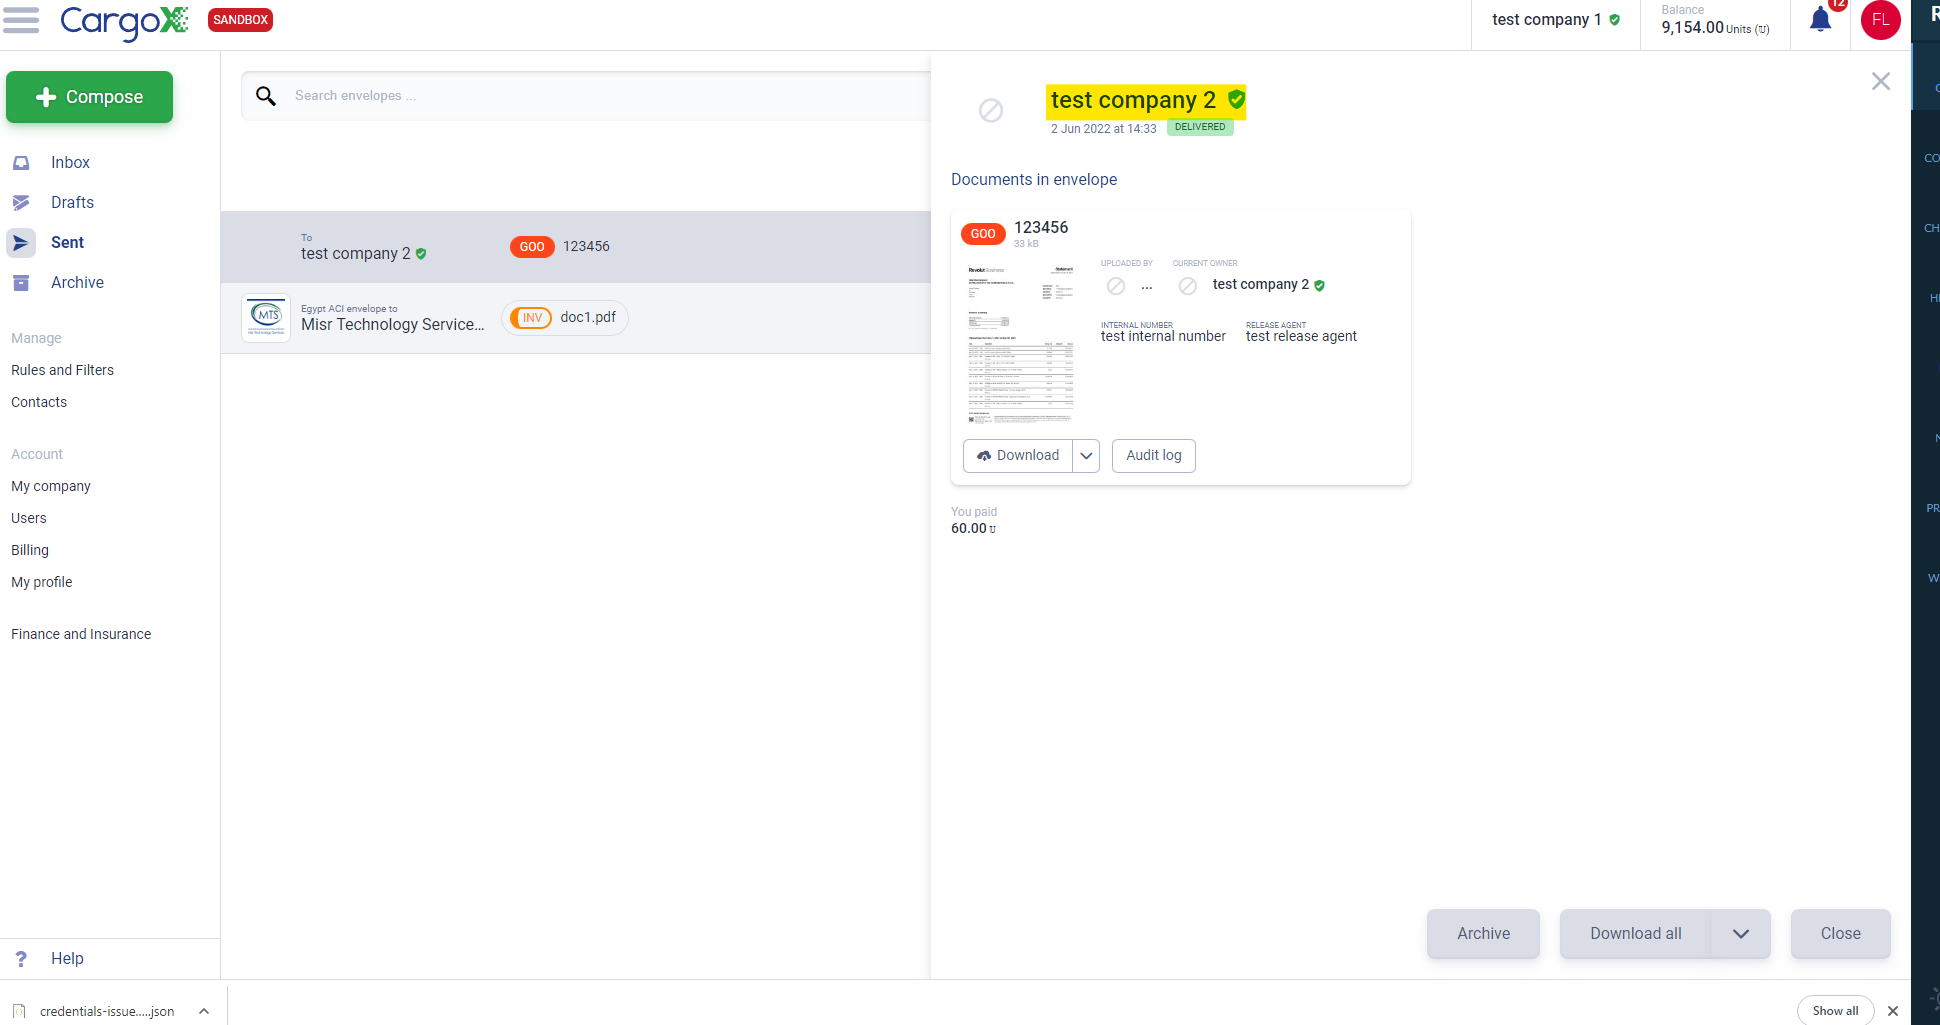
Once we are done with those two steps, we can see in our web app the envelope was delivered to our contact test company 2.
Standard Envelope
Next we will create a Standard envelope. Just click on Standard Envelope -> Create Standard Envelope. Again, the only thing we have to add is a pdf document.
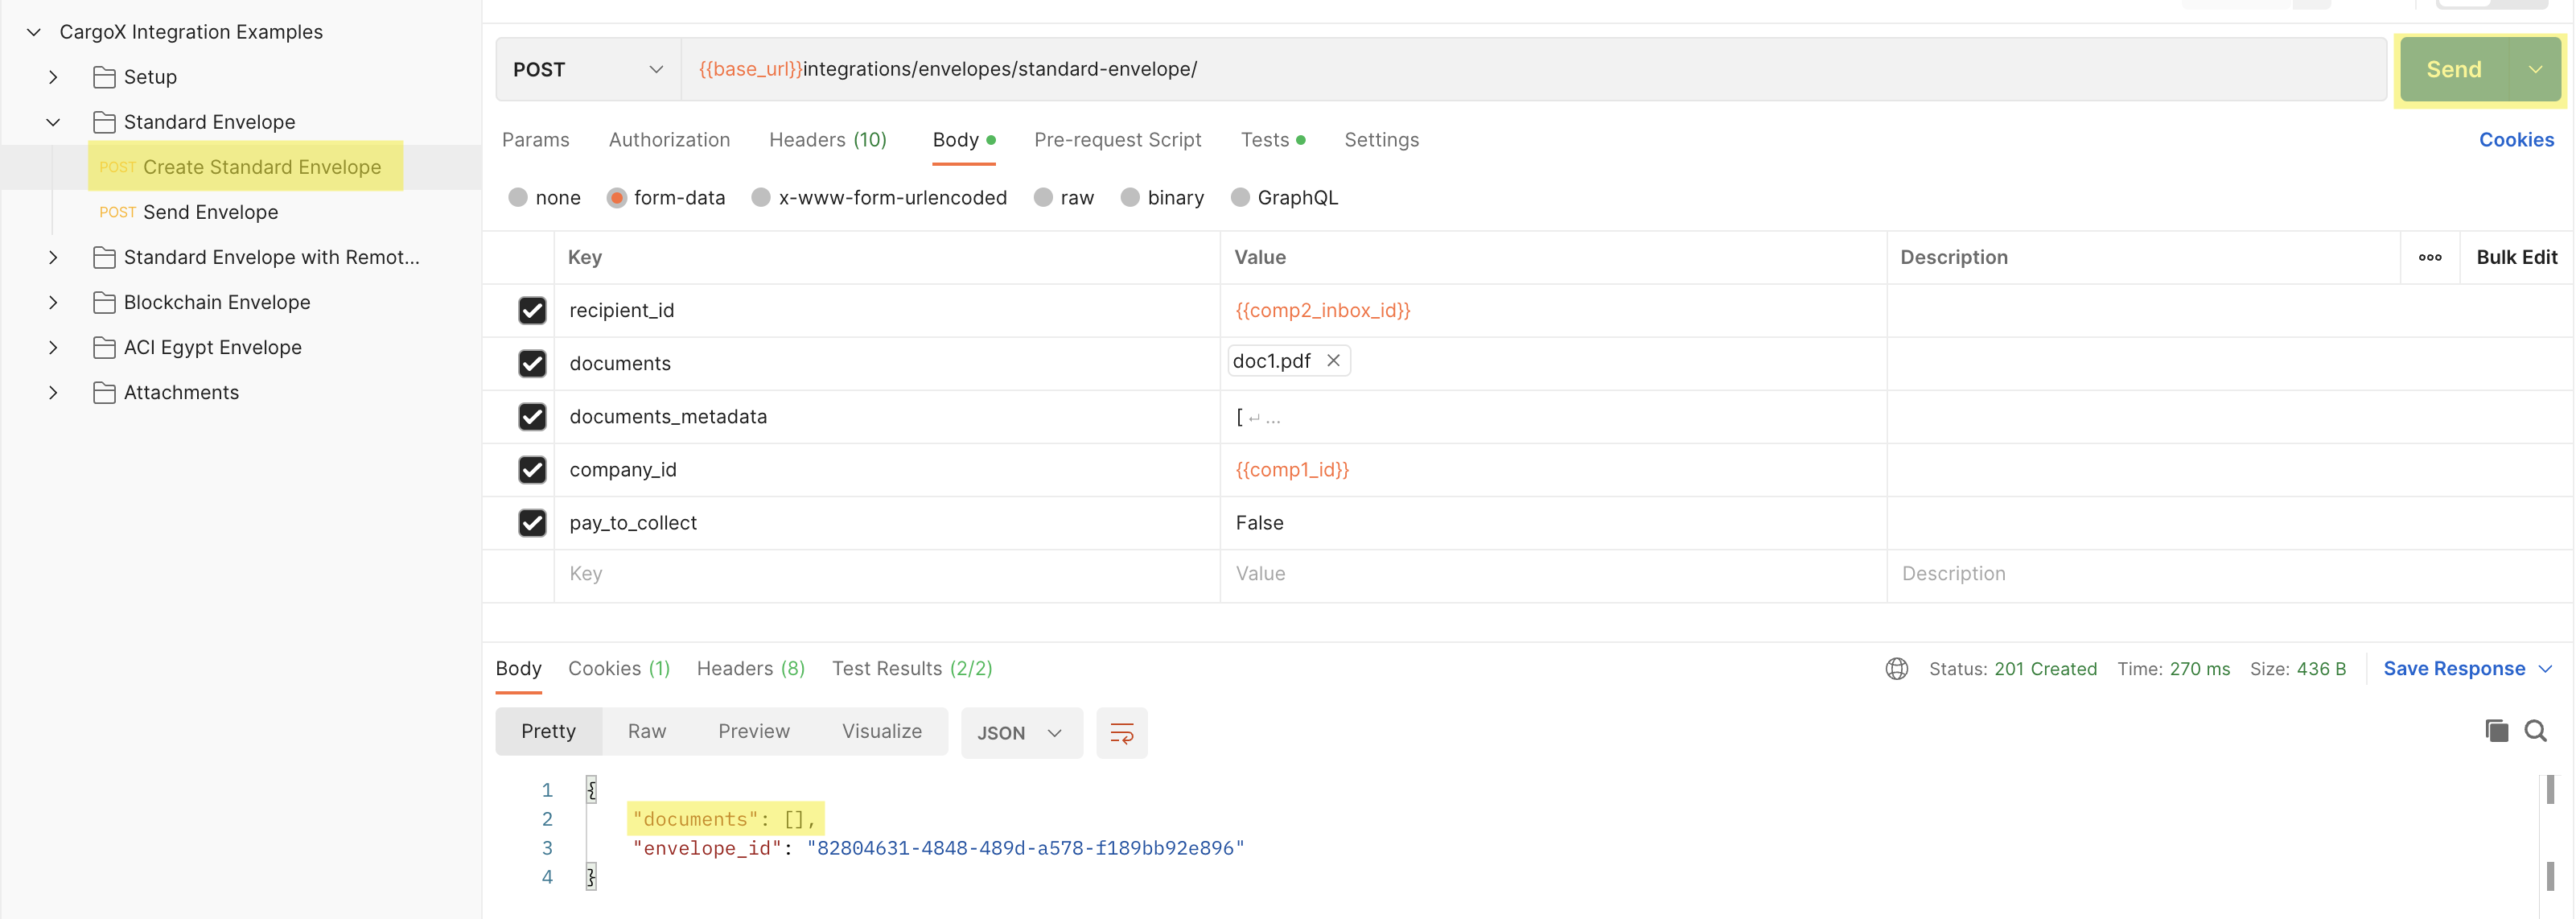
Standard envelope can be send with or without the blockchain support. Difference is in the document type. Some have transfer of ownership, some partial and some none (you can find that info in the Postman collection under Setup -> Collections list). When we create envelopes through API calls, we set up document type in the documents_metadata parameter - just check postman examples!
Documents with transfer of ownership will have to be signed remotely (see Standard Envelope with remote signing) but if the integrator wants to sign the envelopes please use Blockchain envelope.
After we click send, we can immediately see on web app that envelope has been created. Click on the Drafts tab and open envelope. As we can see, the recipient now is Comp2 from our Company and contact creation. We can also try and Transfer this new envelope.

Next, we can transfer the API using the Issue endpoint that we've used before.
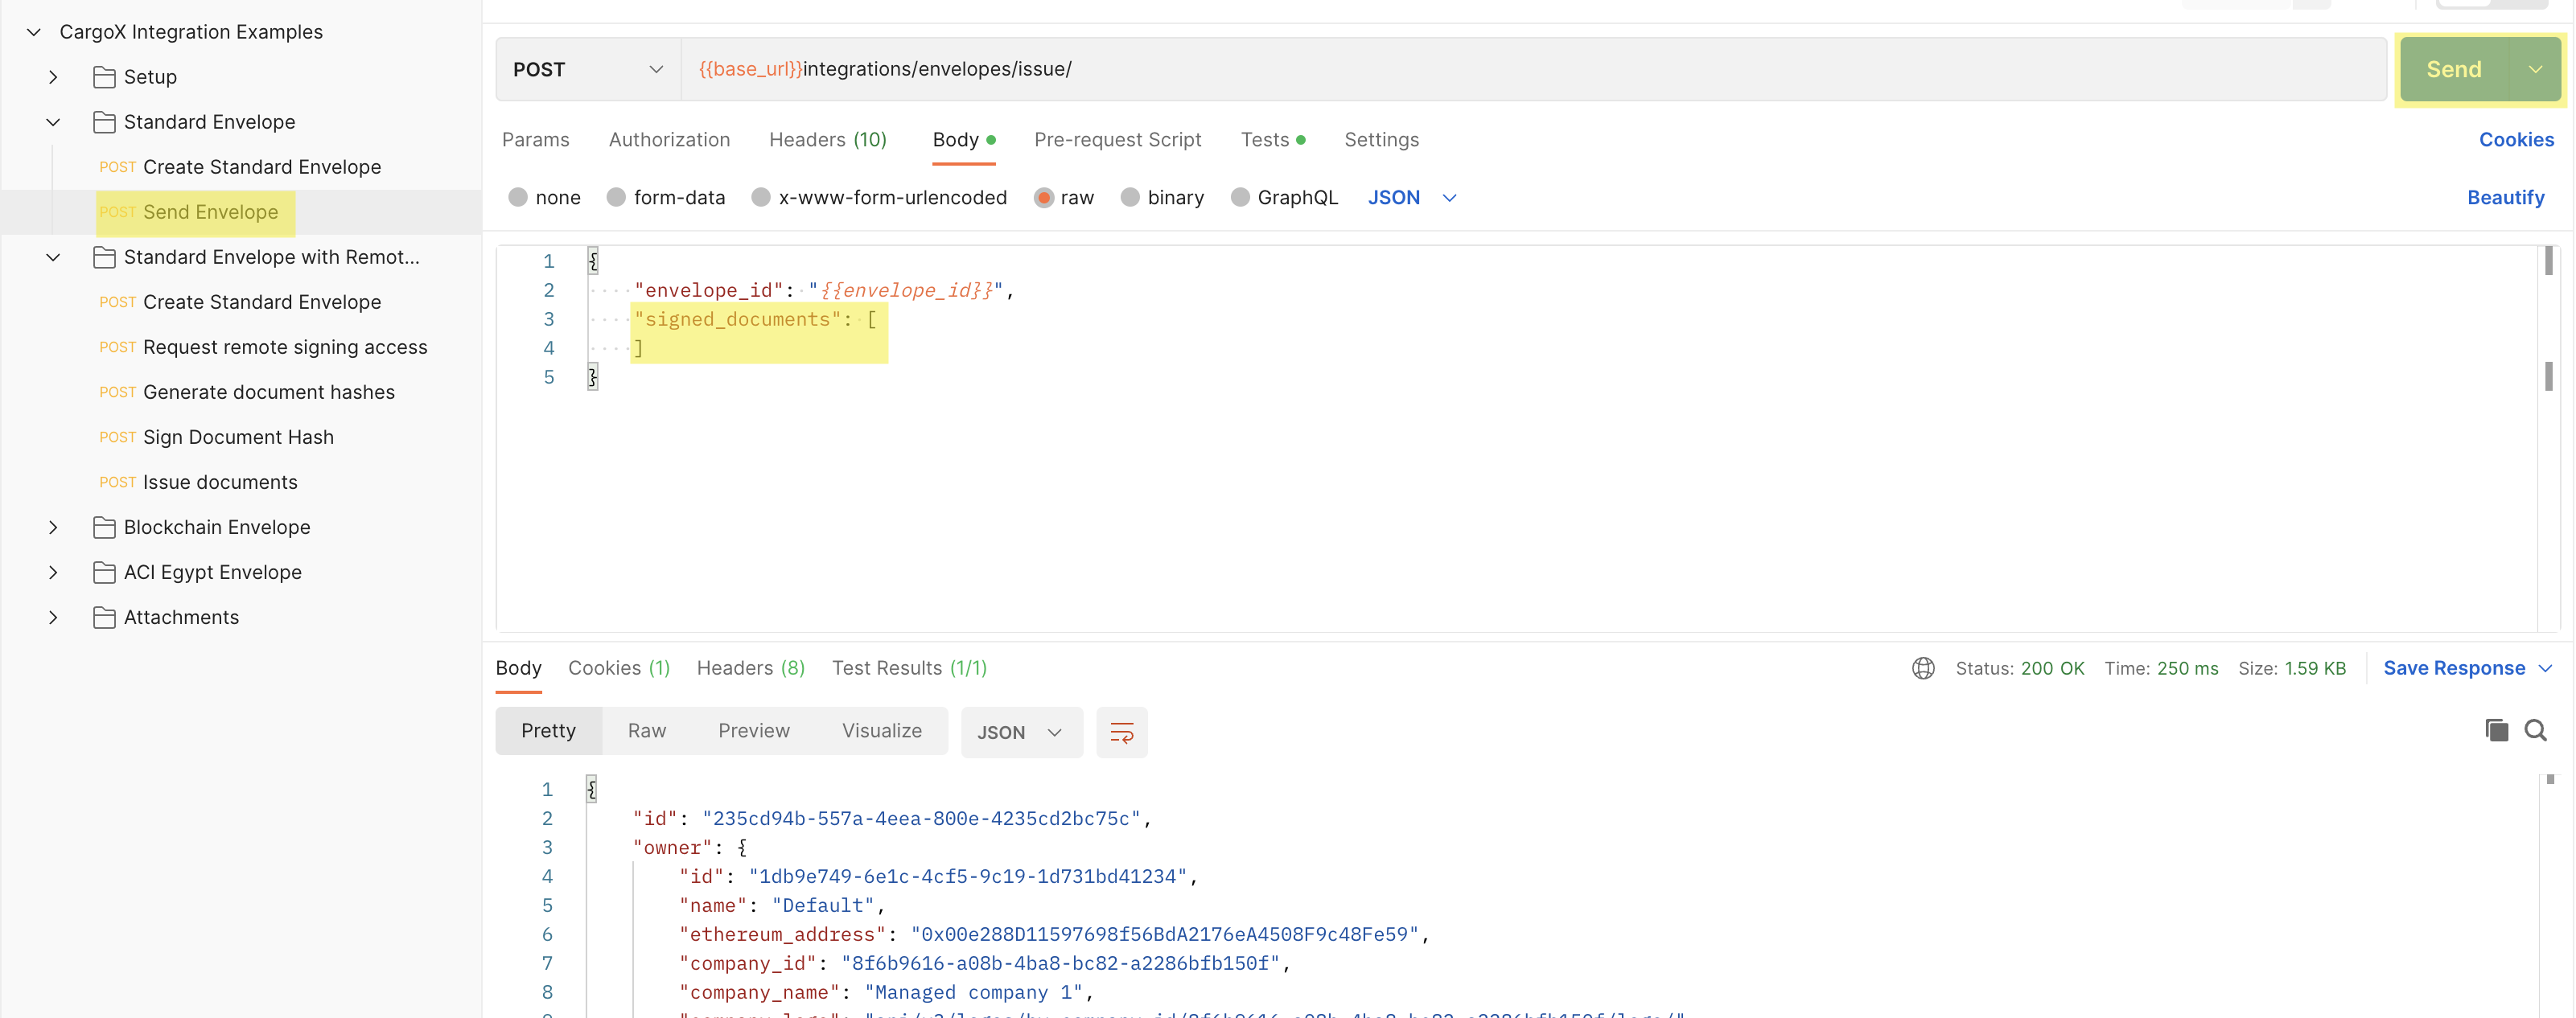
Standard Envelope with remote signing
We start with the creation of the standard envelope just as before, but this time around we use the GOO document type which has a transfer of ownership (Standard Envelope with Remote Signing -> Create Standard Envelope). However, if we wanted to call the Issue endpoint from the previous section again we would receive a following error.
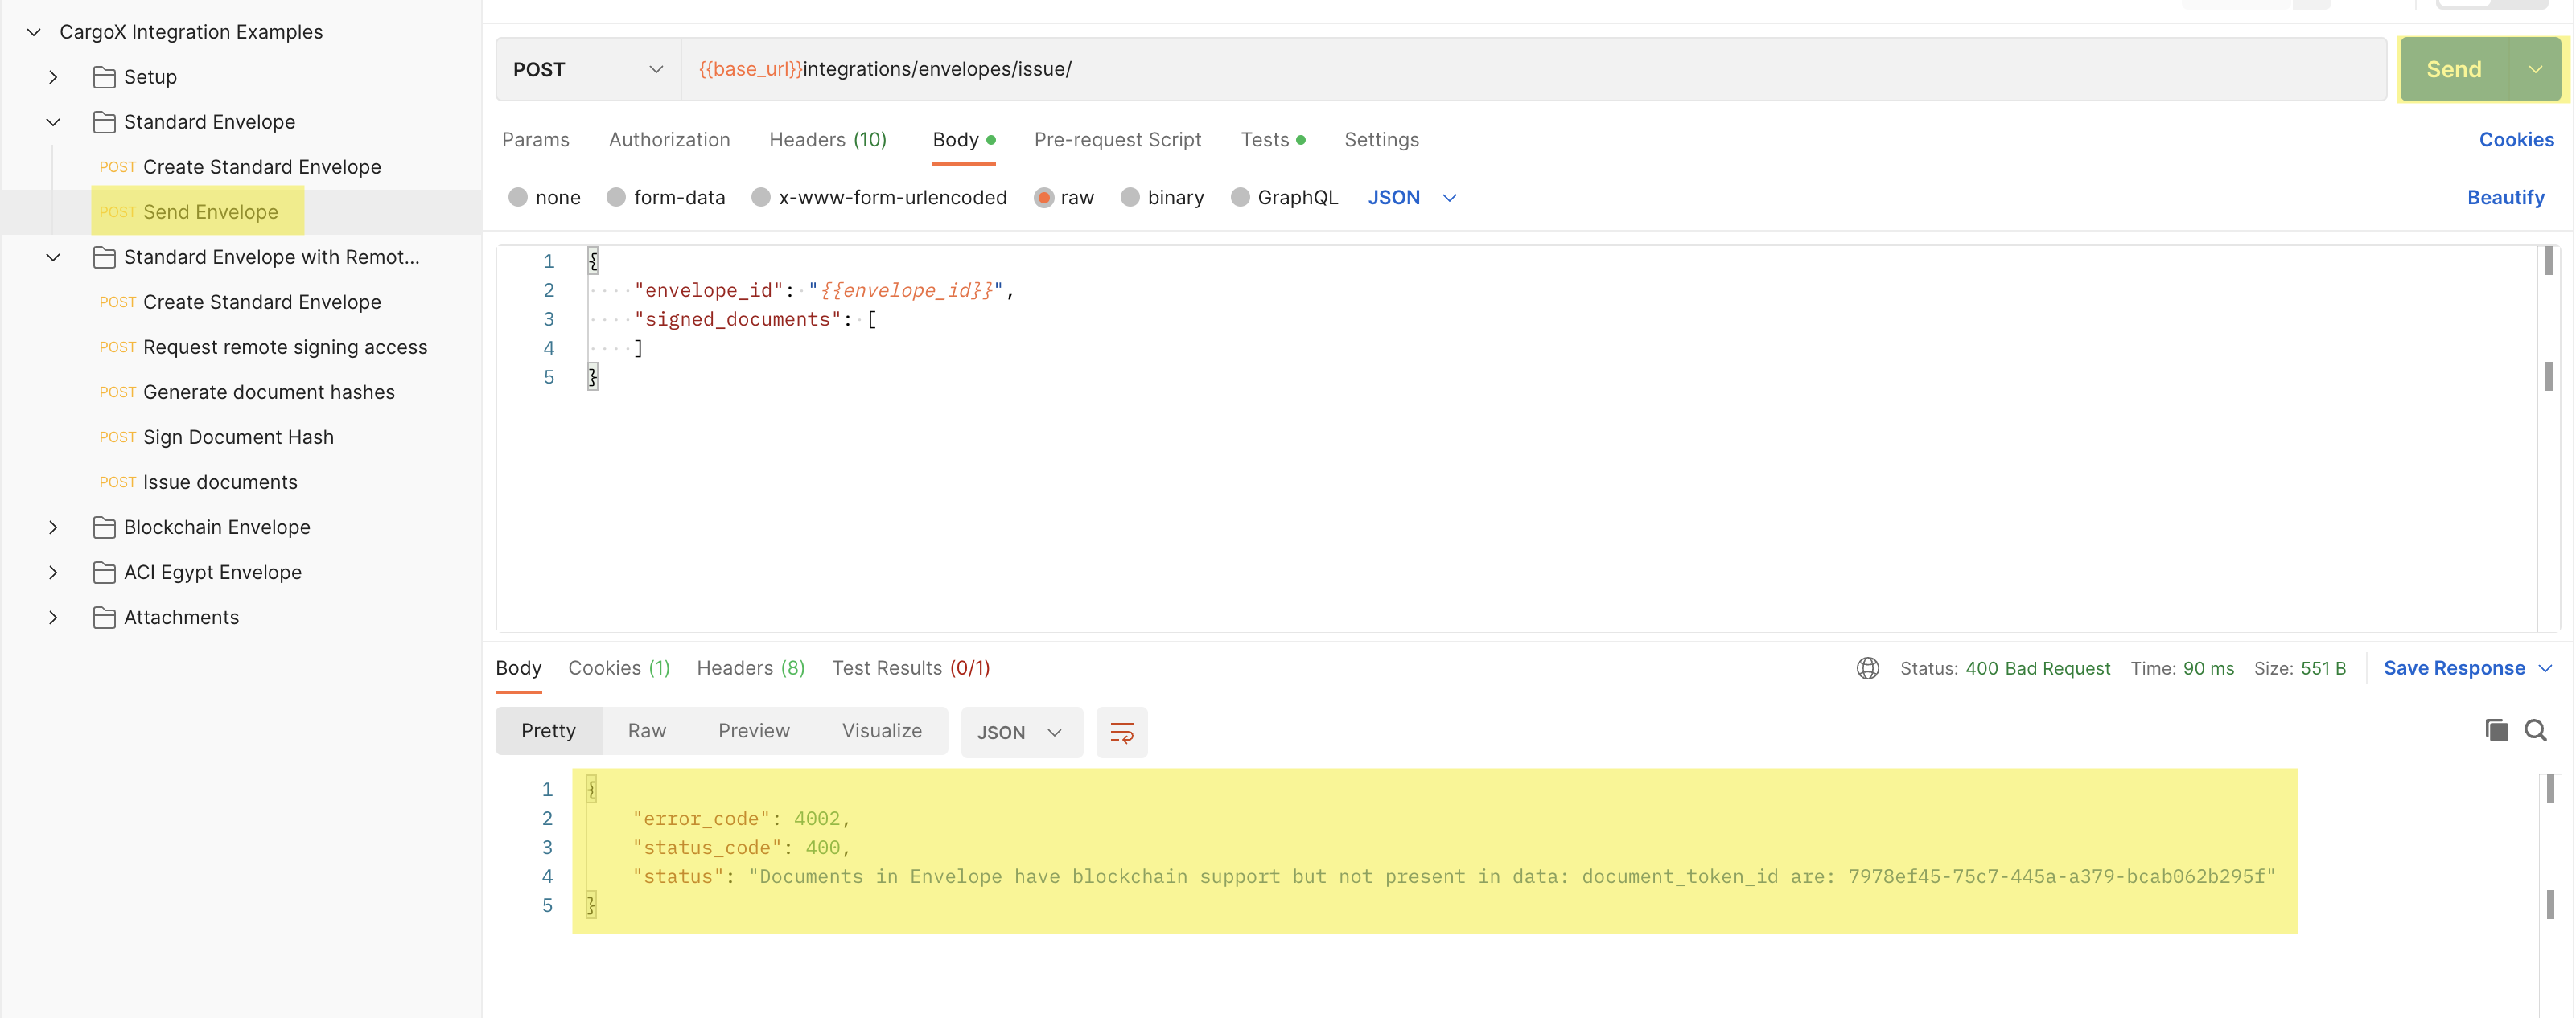
This means the document will have to be signed. Let's assume that we are not in possession of the users' private key (unlike in examples for Blockchain envelope and Egypt ACI envelope). That means our managed user will have to sign the documents themselves. First we start by requesting the remote signing access using the user's ID. We can also provide the redirect URL where users will be redirected after signing on the web app.
GUI app for user signing is not part of this Postman collection. Talk to your CargoX representative if you suspect you might need an app for the integration of remote signing.
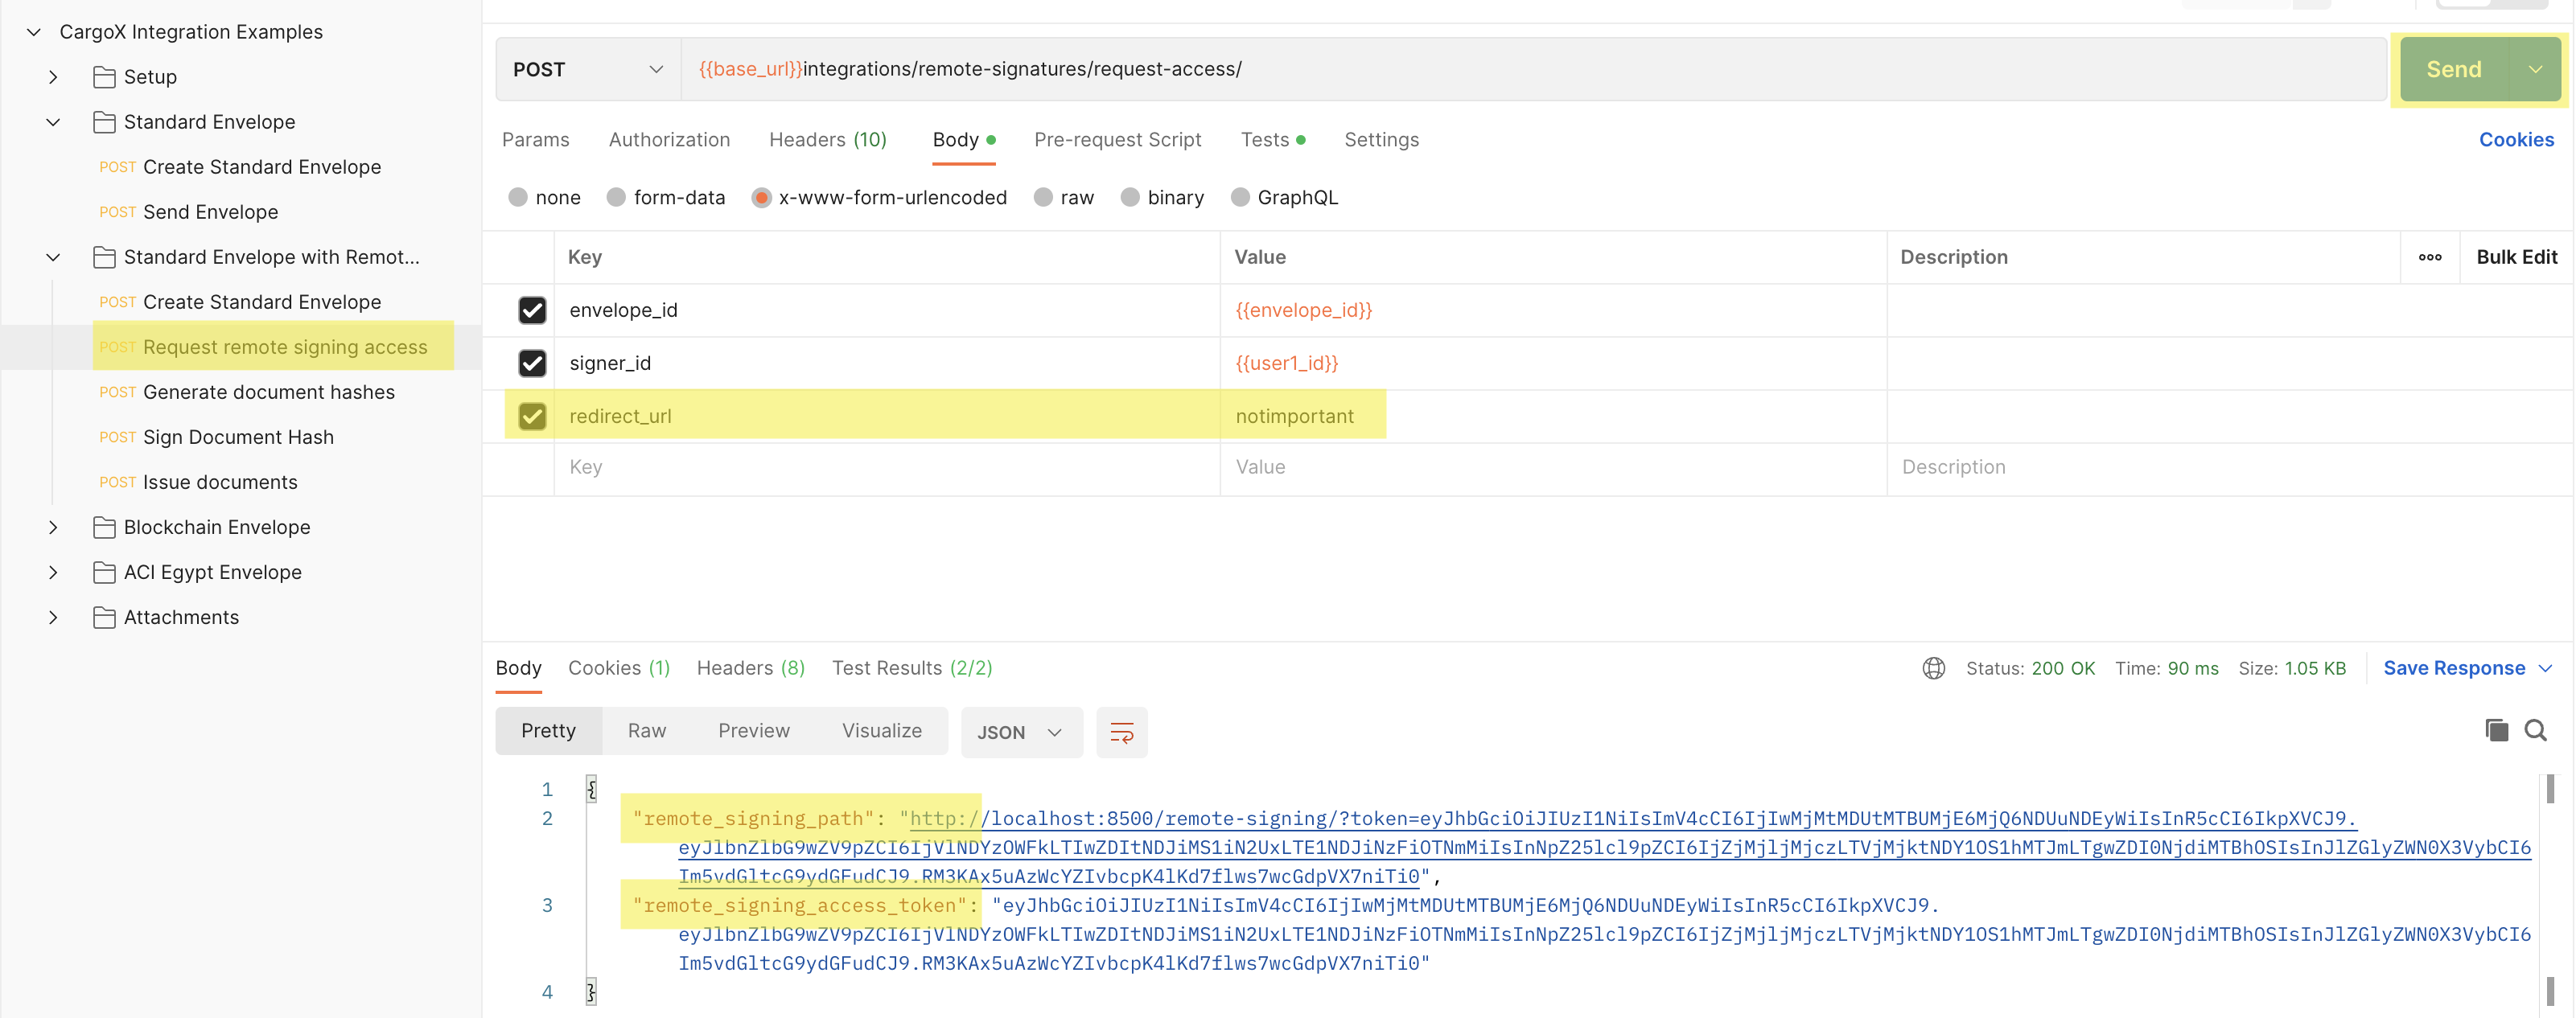
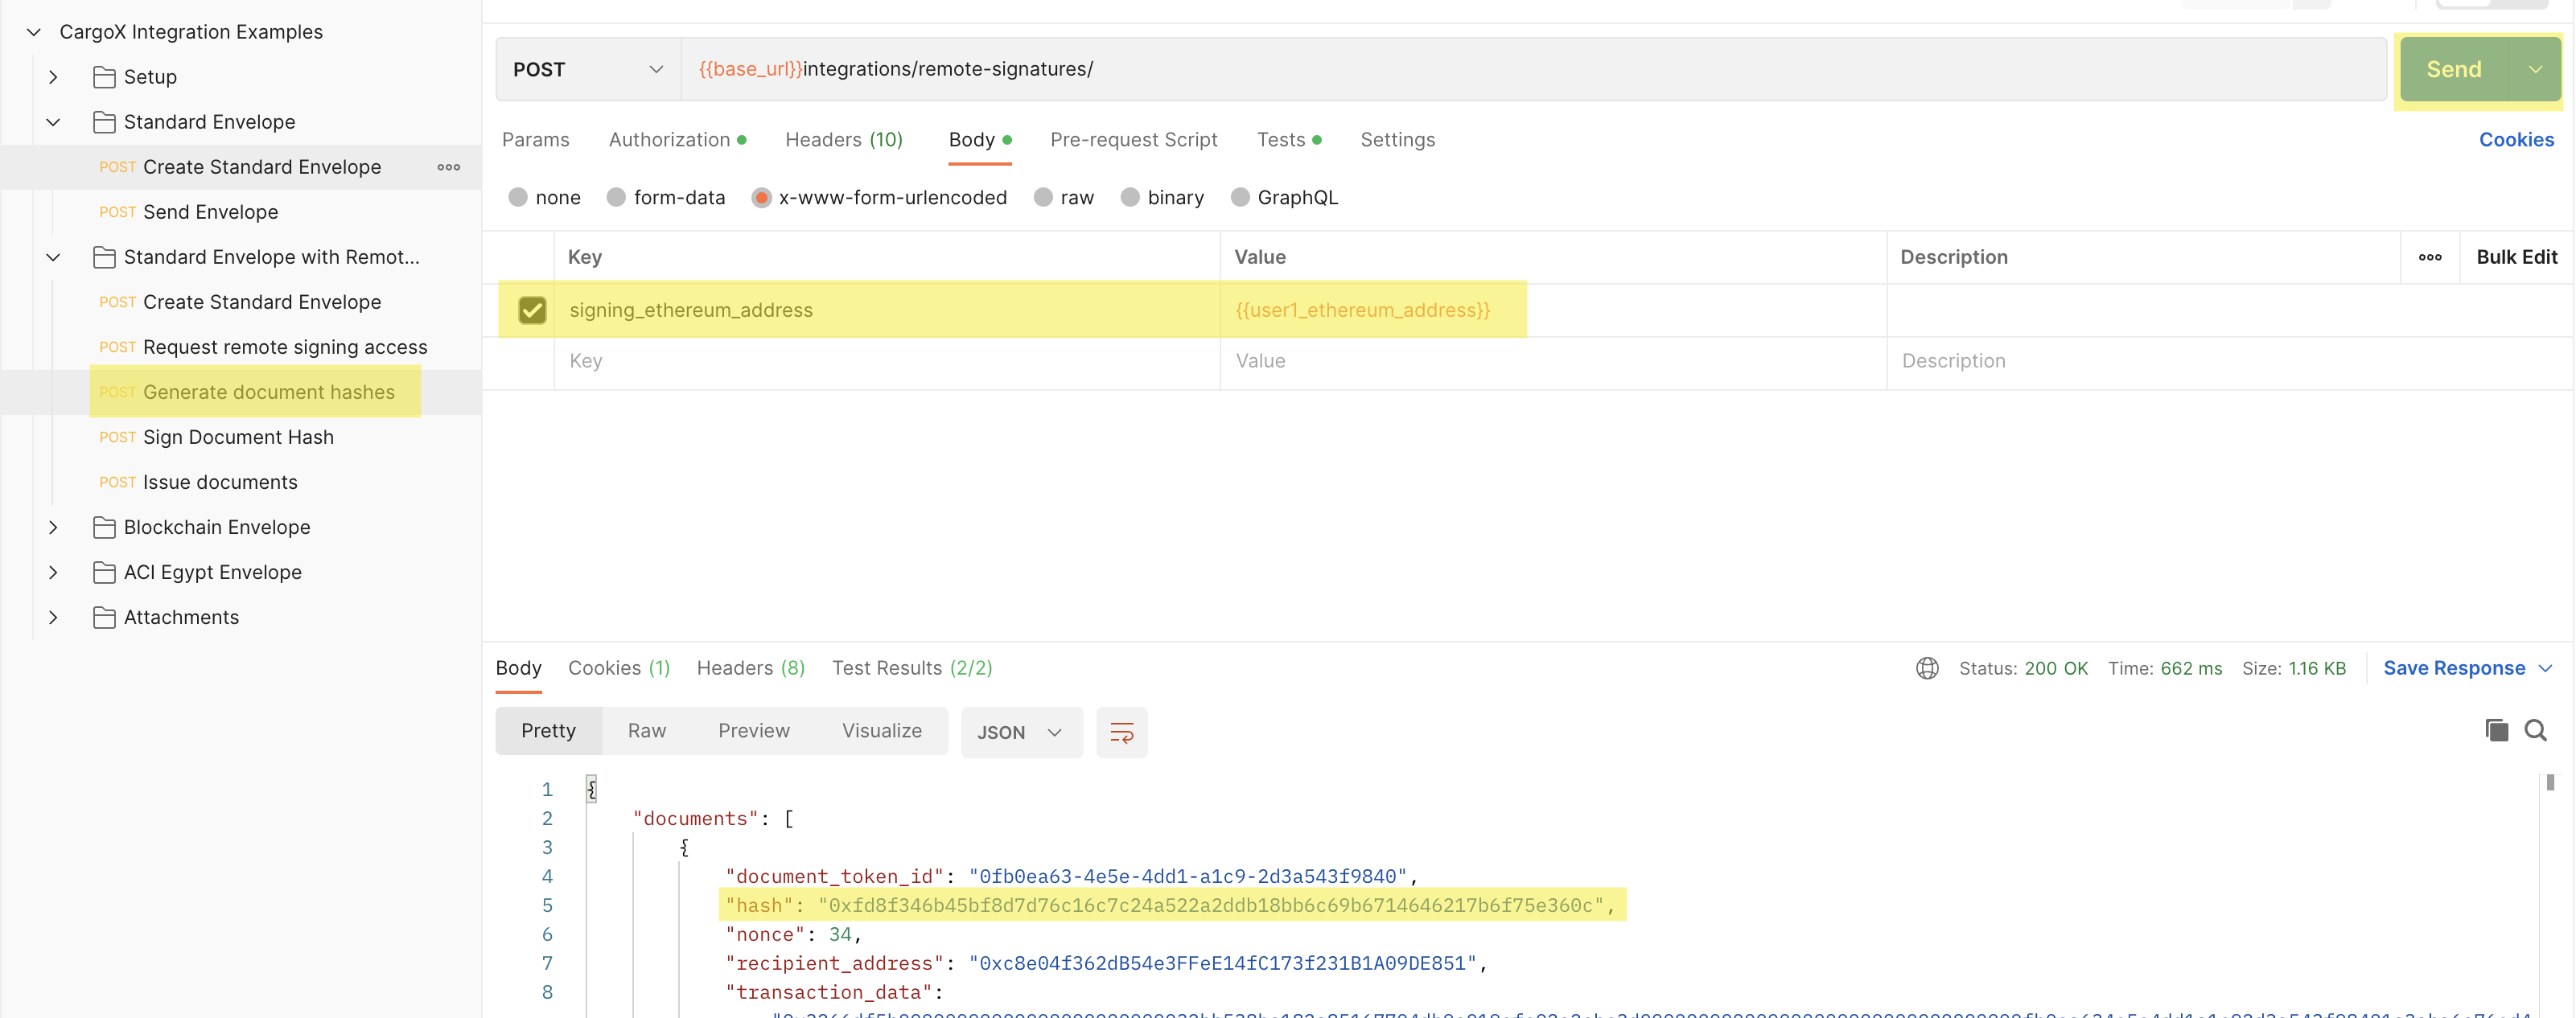
We will ignore the remote_signing_path for now, but remote_signing_access_token will be used as an authentication for the next two actions (these are not performed by the integrator but rather by the user). Firstly the user generates document hashes for signing.
Documents are then signed by the user. You can use tools such as https://etherscan.io/verifiedSignatures to sign the documents or we can use our web3_docker_service as we did previously in Egypt ACI envelope (this step is added to the Postman collection). Also similarly to previous blockchain envelopes we need to call the Issue endpoint with generated signatures to transfer the envelope.